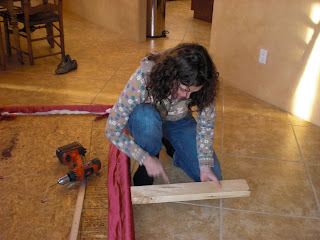
I made and installed a new headboard for myself and I thought I would show you how I did it and how it turned out. First I cut a piece of particle board to size (60x32). I used some 1x1 to frame out the entire back...this gave it a more substantial look. Then I pre-drilled some holes for the tufting later. I used spray adhesive to attach some high density foam to the entire front. I then covered that with a egg carton type foam pad and wrapped it around and stapled it to the back. Then some quilting batting covered that and finally the fabric was wrapped around. I used a silk so I had to be pretty careful not to get a run in the fabric.
Then came the tufting--I threaded the needle all the way through, attached the decorative button and threaded the needle back through. I pulled it tight and used a large button to secure it in place.
I attached some legs to the bottom and drilled the legs into the studs in the wall of my room.
This is how it turned out. I love it--especially because it is pink silk with rhinestone buttons. So girly and luxurious. Pretty easy and the whole thing cost under $100 dollars. I could have done it much cheaper with cheaper fabric and omitting the high density foam step.
Now I am working on getting some new bedding to make the whole transformation complete. Trading Spaces...eat your heart out.


1 comment:
Oooh I love it! I've been trying to come up with a good DIY headboard for my own bed... this looks fabulous and very professional. Kudos to you Mandieloo! I don't know why I just said that.
Anyway, it is so totally fab!
Post a Comment